#
Using a testing environment
The Artificial Intelligence Device Web Service (AI'VIEWER) is a service that runs on external devices (your own or rented), such as a Virtual machine, Jetson or Raspberry Pi. It allows to recognize objects live from newly uploaded photos, recordings or directly from the camera, based on previously trained models.
#
Logging in
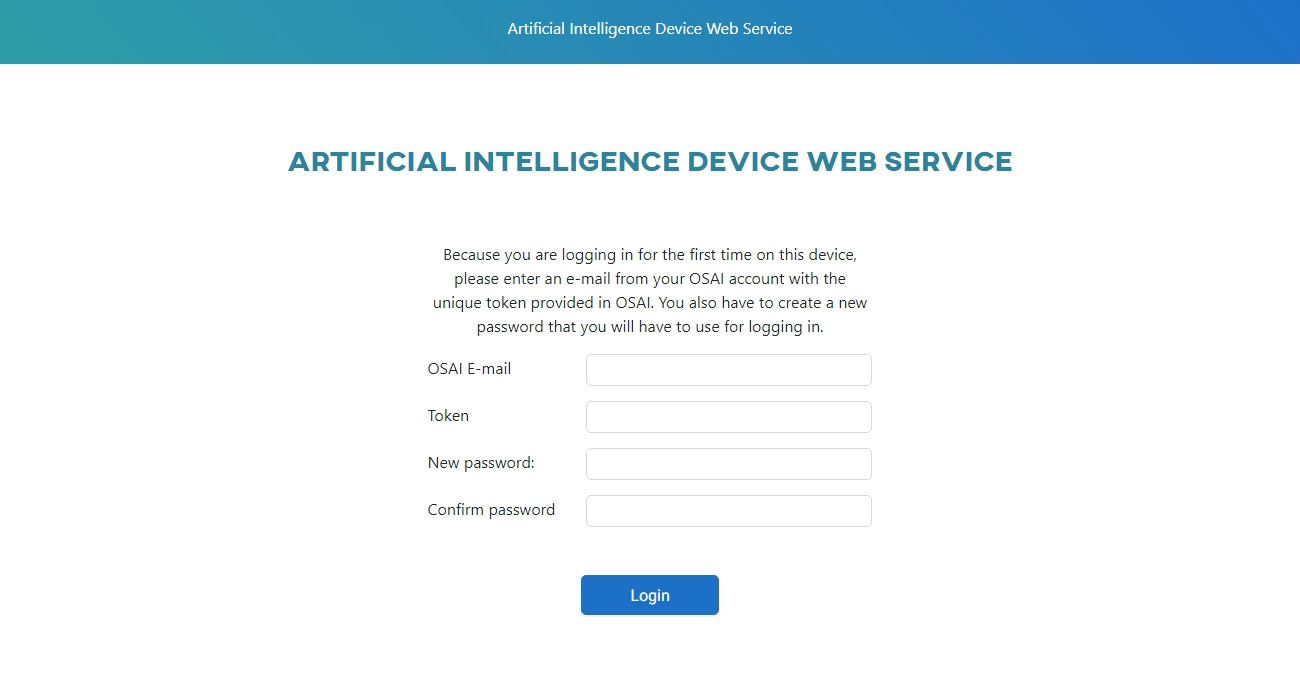
When you click the Login button, you will be redirected to the Web App. If you are logging in for the first time, you will be asked to enter a token in addition to your email and password. Once logged in, the status of your device will change to Connected.
You can copy the token by clicking the Connect button next to the record representing the device you are currently using in the Development tab of the OSAI portal.

Cameras Live testing Results - Documentation
#
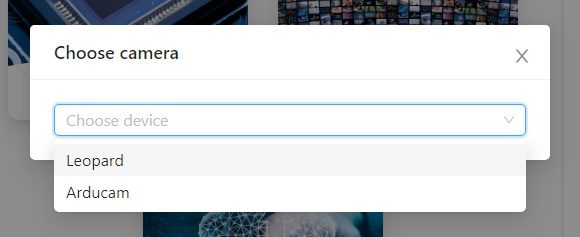
Camera
AI'VIEWER allows you to use your own cameras connected to the device. You can generate images and upload them to a dataset in your account. To use a new camera, click Add camera. We currently support the following camera types:
- Leopard Imaging MT9M021C USB
- Arducam IMX477HQ Camera CSI2
- Arducam IMX477HQ Camera USB
- Arducam 8MP 1080P USB
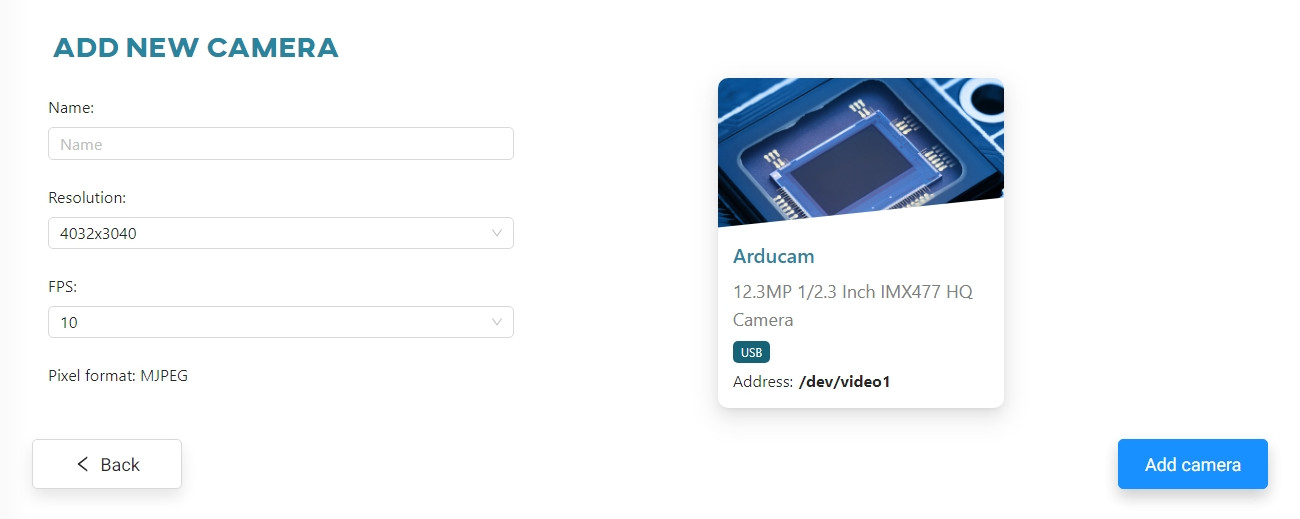
- Name - camera name
- FPS - number of frames per second
- Resolution - resolution at which the camera will operate
In addition, the Leopard camera has the following options:
- Exposure – responsible for controlling the iris and adjusting the level of incoming light
- Gain – digitally increases brightness
- Auto exposure – automatic attempt to adjust the brightness to the prevailing conditions
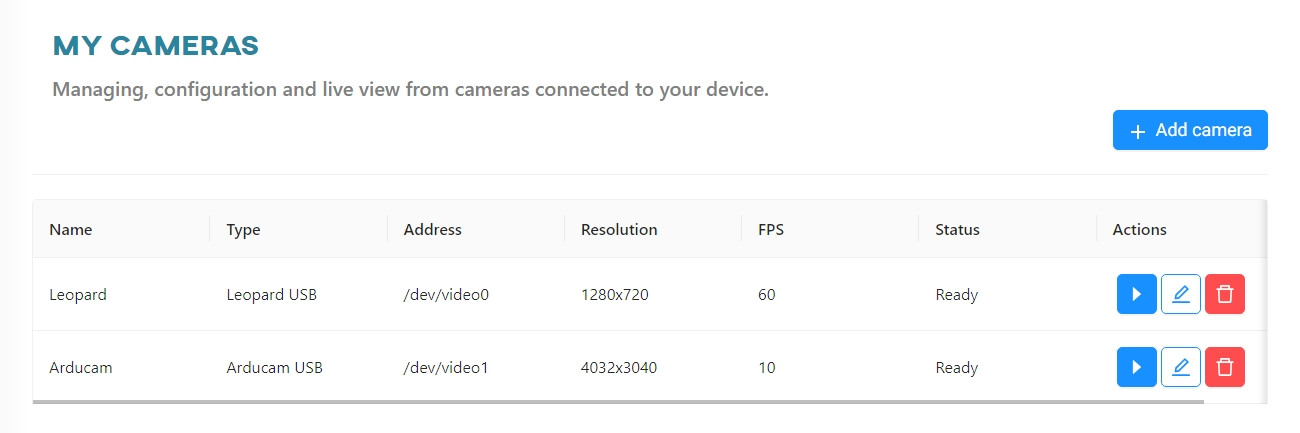
OK, your camera should be visible in the list of enabled devices. From here you can:
- Enter preview mode and generate images from the video
- Edit camera parameters
- Remove the camera from the list
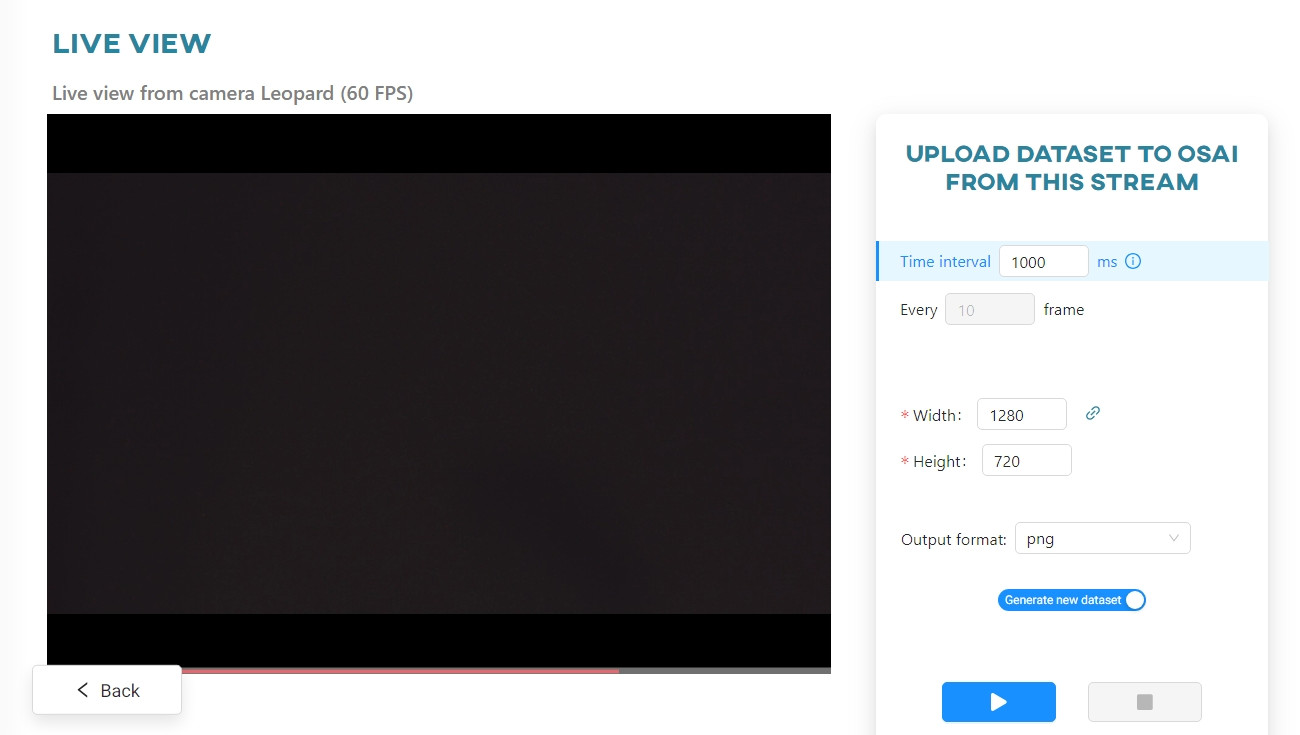
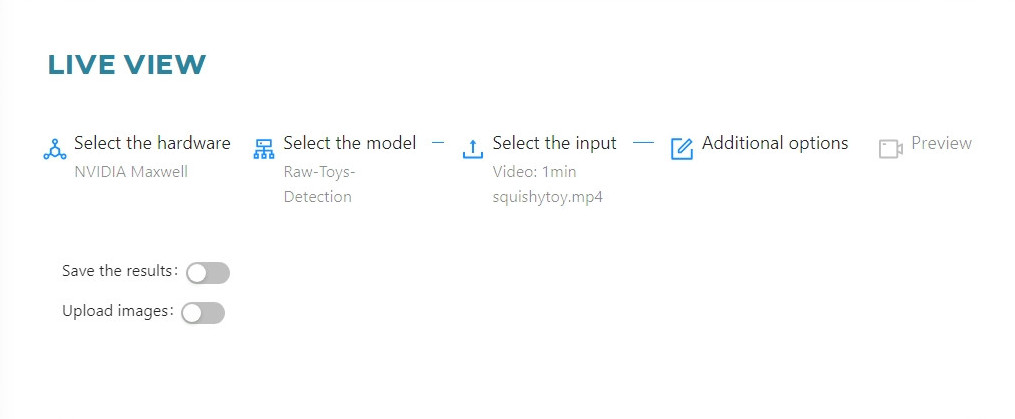
In the Live View, you can see the camera view and the sections for generating images. The following actions are possible:
- Change the image generation option:
- By time interval
- Every X frame
- Select the size to which the generated camera image is to be scaled
- Change the format in which the files are generated
- Choose whether to generate in a new dataset or save to an existing one
- Change the counter of the generated images
Control the process with the Start and Stop buttons.
#
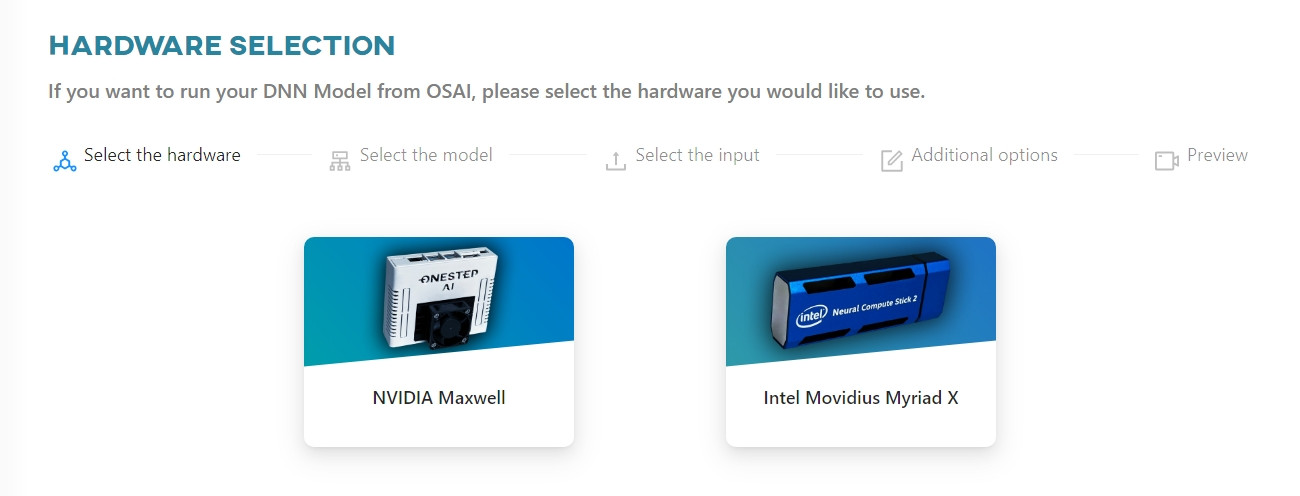
Preparing the test
A device connected to the service automatically displays models that match the computing hardware specified during the device addition process and already converted.
AI'VIEWER displays a list of models available from the OSAI service according to the selected computing hardware. Currently, it is not possible to use a model other than the one from the OSAI service for an application.
If you do not see your model listed, please make sure it has been converted to a format compatible with your chosen hardware.
On the right side of the Web App main page is a menu that allows you to view test results, change credentials, and log out.
#
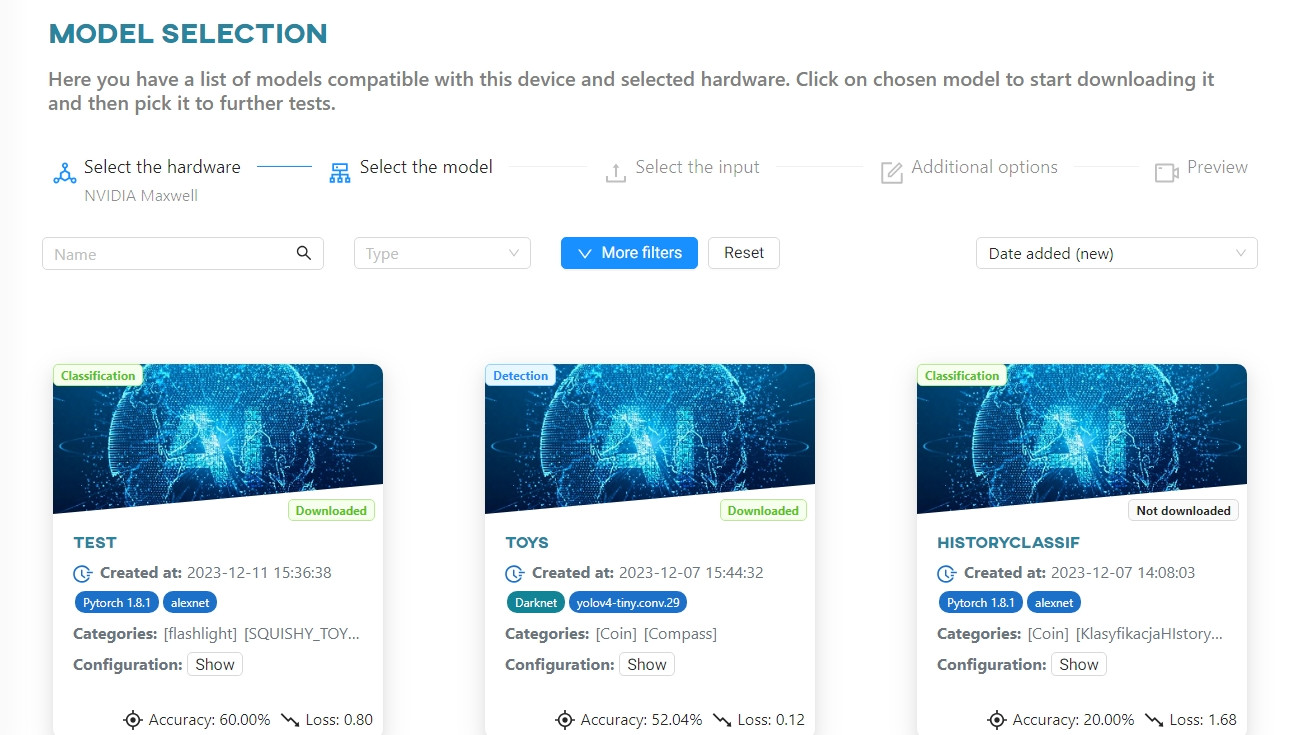
Downloading the model to AI'VIEWER
To run the selected model, download it to the device.
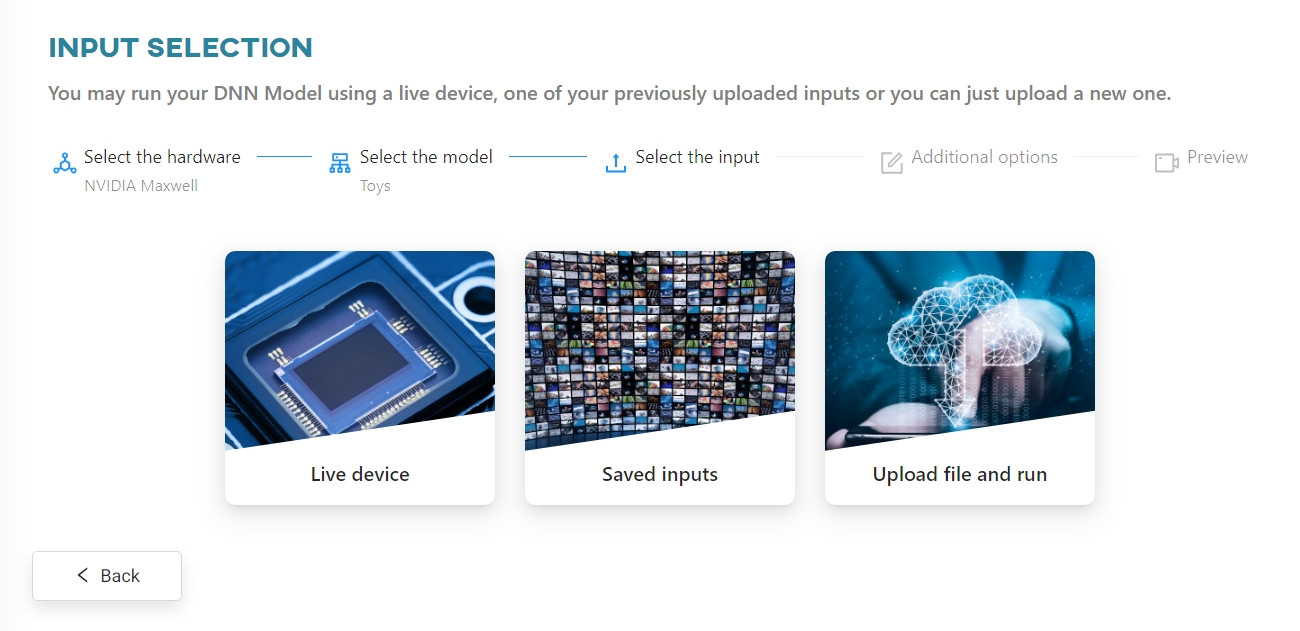
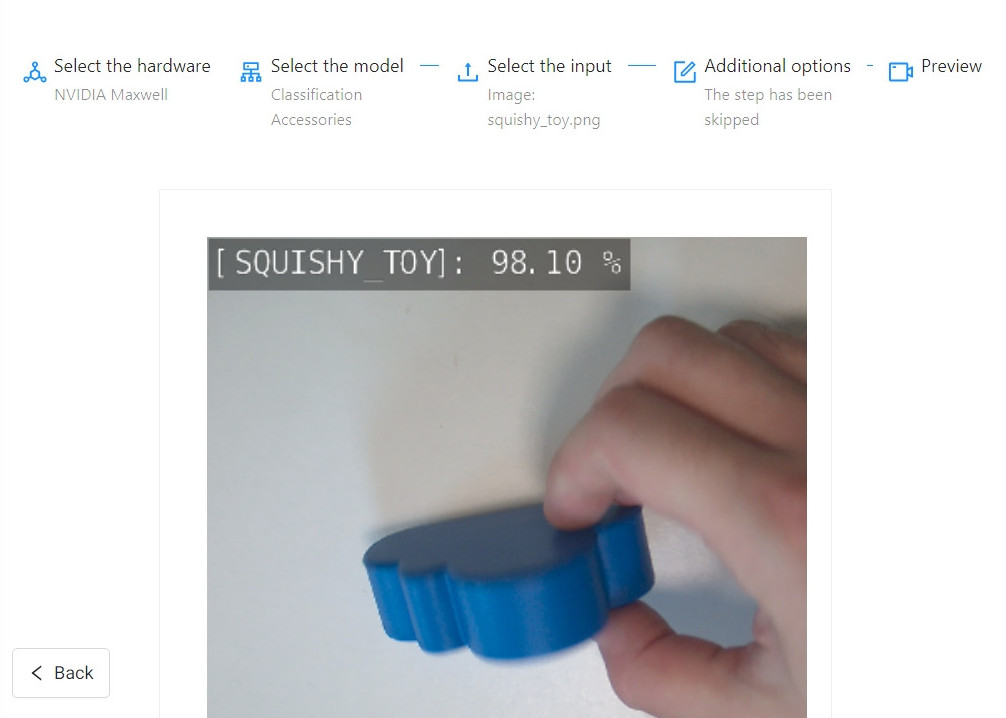
Select the model from the list and add the input data. The Web App allows you to test the model with a live video stream or on a saved video file that can be uploaded or selected from those stored on the device. A similar test can be performed on an image.
#
Running the test
When everything is ready, the test will automatically start for the loaded data. If you are using data stored on the device, click the Run Model button.
#
Running the model on a camera
Select Live testing and choose from the configured
If you do not have any camera configured, the system will redirect you to the
#
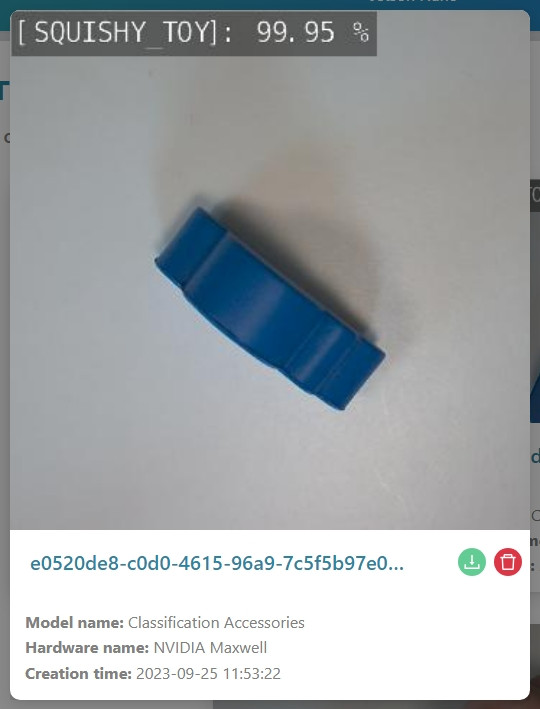
Checking the results
After running the model on the selected source, you will be redirected to the page with the results.
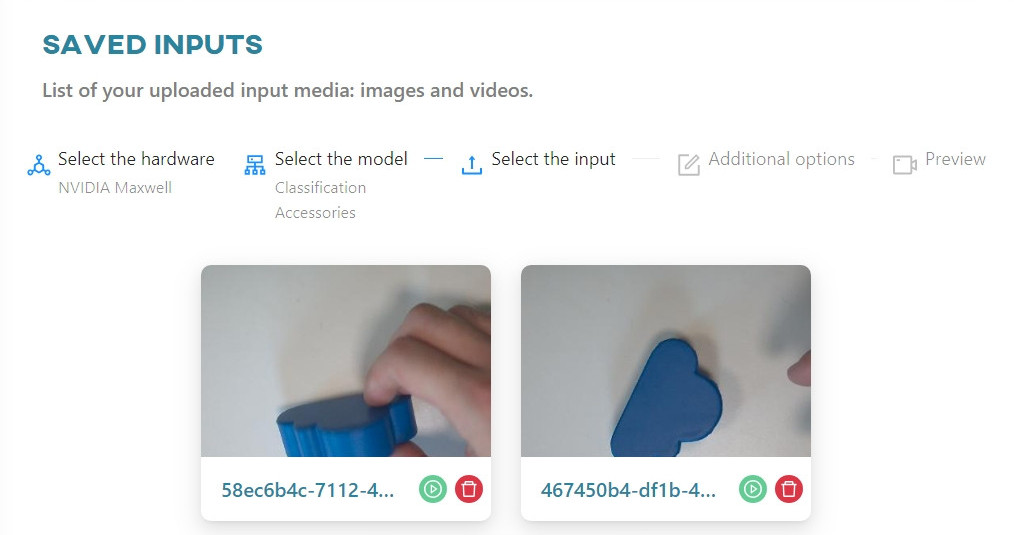
The image that was previously sent to the server can be found in the Saved Inputs view. You can now run a new (or the same) model on this data.
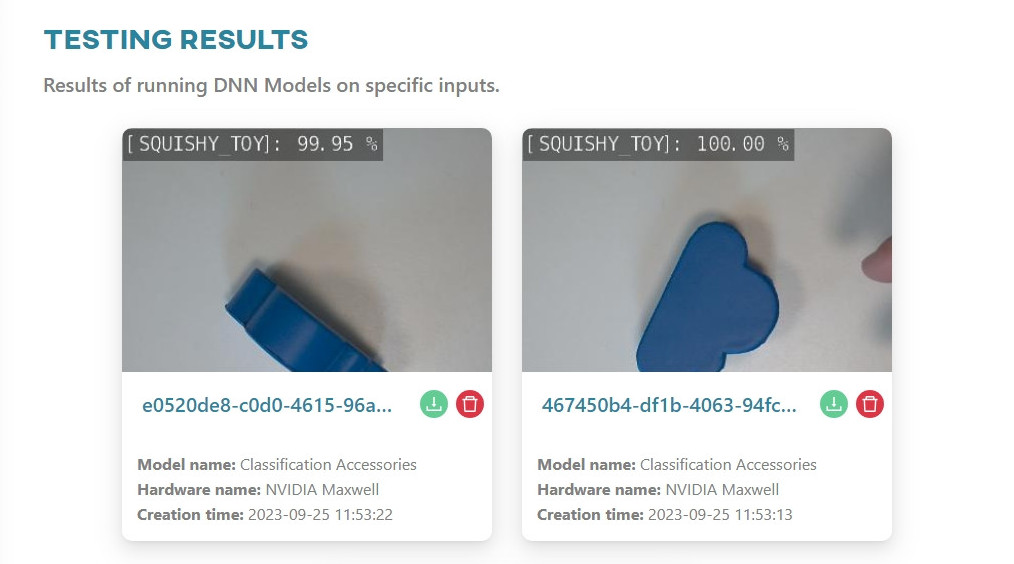
Results section, you will find the input image with the result of the model run added.
In the case of a video file, running the model will take you to a video player page. You can decide if you want to create a dataset based on it in ONESTEP AI with classes/annotations and view the results in real time. For detection networks, the resulting file will contain the selected recognition areas along with the labels of the objects that have been classified on them.