Training
Once the dataset is ready, you can start training the models.
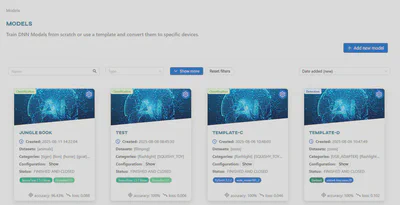
In the main menu, go to the Trainings tab and then click on Models. As you can see, the collection of models looks similar to the catalog with our datasets. Click Add new model to create a new model.
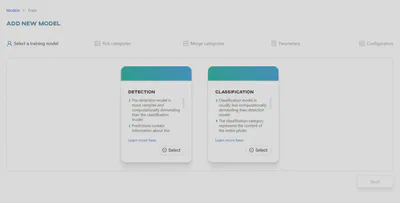
Next you need to decide what your model will be used for. We support several frameworks for creating both Detection and Classification models.
Classification
Move on to the configuration of the classification model. Select Classification.
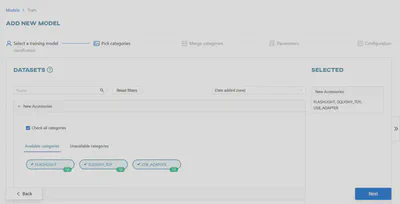
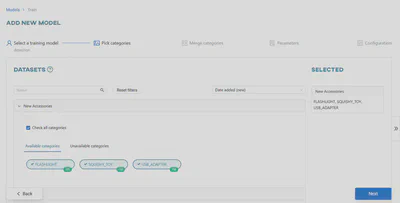
Select the dataset called New Accessories. Continue by clicking Next.
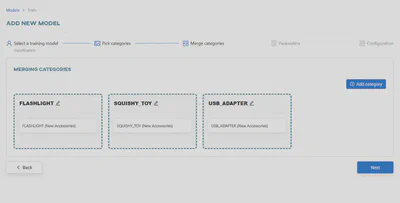
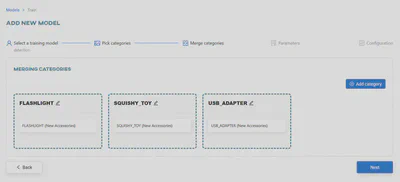
The next procedure is to merge multiple datasets. As you are using only one dataset, you can skip this step. If necessary, you can also rename categories at this stage by clicking on the pencil icon. Click Next to proceed.
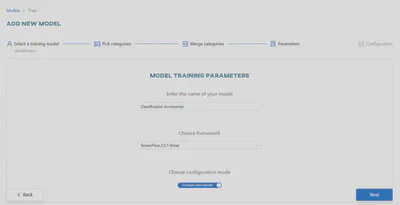
Enter the name Classification Accessories and select the TensorFlow 2.5.1 Keras from the list of frameworks. Leave the Configure automatically option on, as this will set the approriate training parameters. Click Next to continue.
Frameworks develop quite dynamically, so your version may differ from the one shown in the tutorial. If this is the case, use the latest version available on our website.
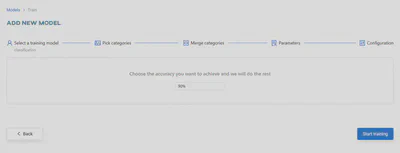
Thanks to Automatic Parametrization, you do not need to worry about model configuration. Set the accuracy at which you want your model to be trained, enter 80%. Click on the Start training button to begin training.
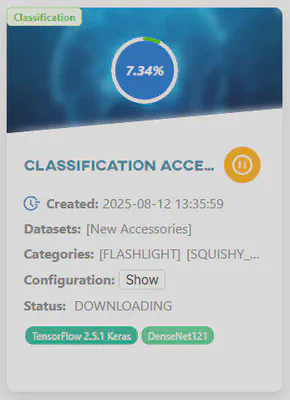
The training should now be initializing, you can see this in the Notifications or Tasks tab. Go back to the Models to see the current status and progress.
Due to hardware reasons, our app can only handle a certain number of trainings. It is possible that your training may end up in the waiting queue, but do not worry. Your models will not disappear when you leave the page. As soon as the machine is available again, your trainings will be completed. Read the Glossary to learn more.

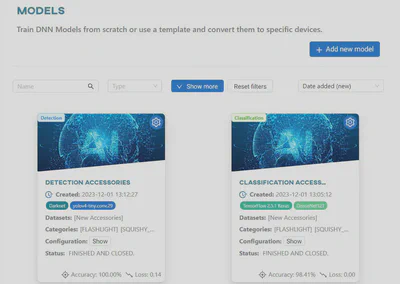
Once the training is complete, click on the gear icon and select Details to check the results. As you can see, the model was trained in 2 minutes and achieved 100% accuracy. Unfortunately, our training dataset is not diverse, so the model reaches high accuracy very quickly. If you want to learn more about the meaning of other values, read the article Tracking model performance, where we will explain the labels.
You can download your trained model by clicking on the Download model button at the top or by clicking on the gear icon on the model tile and selecting Download.
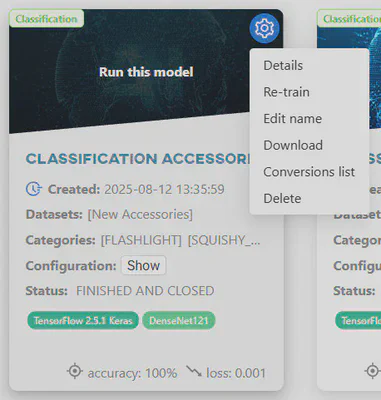
Remember that any model can be re-trained in case of failure or unsatisfactory results. To do this, go to the Models tab, click on the gear icon on the model tile and select Re-train, or click on the Re-train button at the top in the Details view.
Object detection
To train a model for detection, follow the same steps as when configuring a model for classification. This time, when adding a model, click on Detection.
New Accessories dataset and click Next to proceed.
Again, skip Merging categories. Continue by clicking Next.
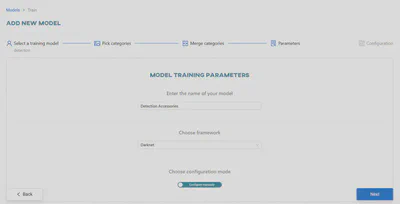
Enter the name Detection Accessories and select the Darknet framework. For detection, you will use the Configure manually option. Click Next to continue.
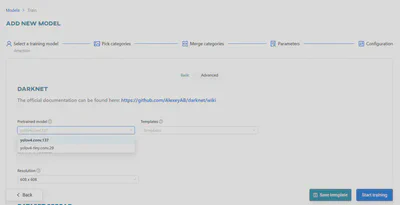
The default pretrained model yolov4.conv.137 in DARKNET takes a very long time to pretrain. Use its smaller version yolov4-tiny.conv.29 so that you can use the model after only a few minutes. Leave the other parameters unchanged and click Start training.
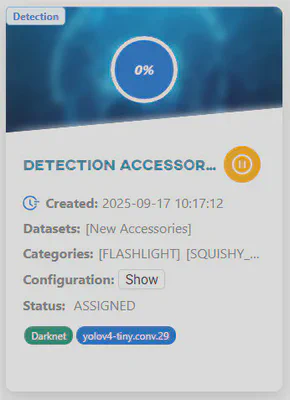
Before you get any results, your detection model must always pass the first 1000 batches. Wait until you get accuracy.
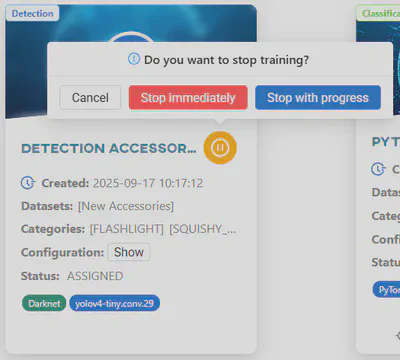
After a few minutes, your model passed the first batches and reached 85.24% Accuracy. In this case, you do not need a very accurate model, so you can stop the training. Click Stop and select Stop with progress from the list that appears, this will stop the training at the earliest opportunity. You can also stop the training by clicking Stop immediately, but this will result in the loss of the model created.
The model has been instructed to stop training. It will terminate its progress at the next validation. If training is not stopped manually, it will continue until 100% Accuracy is achieved or the Batch count limit is reached.
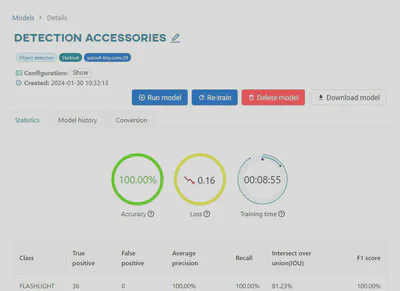
Once completed, you can click on the gear icon on your model tile and select Details to view its performance.