Classification
Run the classification process to find out what objects are present in a given image.
During the upload, ONESTEP AI will load the image categories according to the names of the subfolders in which they are located.
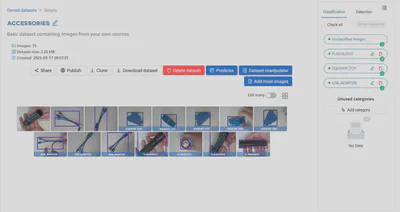
To view the tags, go to the Classification tab in the Datasets view. In this section, you should see the category names under each image. As you can see, some of the photos have no tags. Let’s add them.
To make sure you do not miss anything, you can select unclassified images and add tags one at a time. Click on the Unclassified images tag and then open the photo with a flashlight.
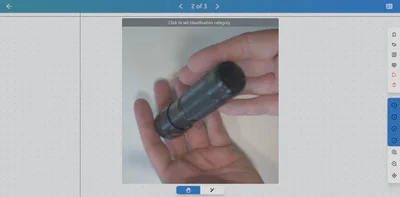
You should now be redirected to the image editor, where you can assign classification categories and add detection labels. To learn how to use the image editor, check out the tutorial on our Youtube channel:
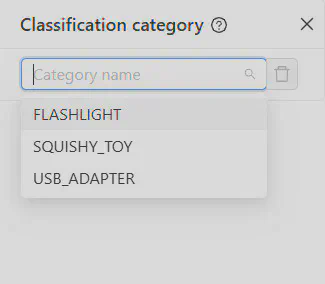
To assign a category to an image, click on the first option Classification category in the right-hand menu.
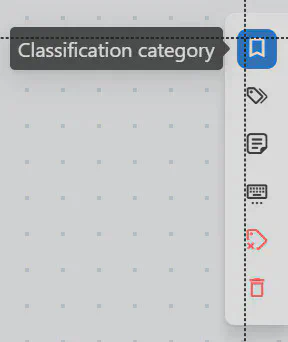
Expand the list and select the appropriate category. If you make a mistake, you can always change the classification category or add a new one by clicking on the drop-down button, or delete the category by clicking on the red trash can icon.
Return to the previous screen by clicking on the arrow in the upper left corner.
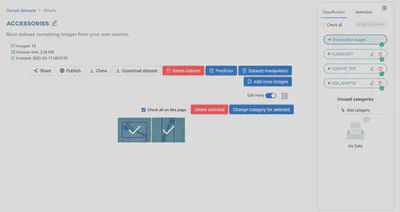
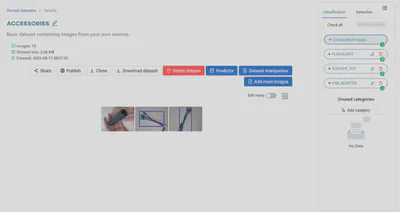
If you have multiple images that belong to the same category, you can add them all in bulk. To do this, use Edit many mode and select the images. In this example, it will be two USB adapters.
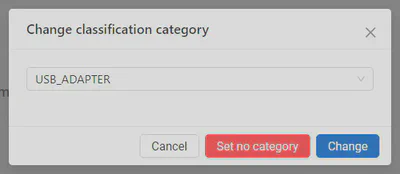
After clicking Change category for selected, select the appropriate category or create a new one, and confirm your selection by clicking Change.

All the images are now classified. The dataset is ready to train the classification model.