#
Adding annotations
If your files are not annotated, or if you want to modify existing labels, you can use the annotation editing tool available in OSAI.
For a visual guide, check out the tutorial on our Youtube channel:
#
Getting started
In the Datasets view, select an image to edit by clicking on it. The image editor will open.

On the right, there is a menu with a number of options:
Classification category- to assign categories,Detection labels- to name the annotations,Image details- details of the image; its width and height in pixels and file size,Keyboard and mouse shortcuts- a collection of all keyboard shortcuts that you can use in the image editor,Delete image- to delete the displayed image with all annotations.

Using the top, navigational panel, you can perform the following actions:
- Return to the detailed view of the dataset,
- Go to the previous or next image within this dataset,
- Select one of the editing modes:
- Basic mode - to select existing labels or create new,
- Automatic mode - to draw one type of label continuously.

The green check mark in the upper right corner of the screen indicates that your last changes have been saved correctly.
Keep in mind: The image editor is fully compatible with touch devices. You can perform any operation using gestures, just as you would with a mouse and keyboard.
#
Adding annotations
To add a new object annotation, click and hold the left mouse button on the image and select the area containing the chosen object.
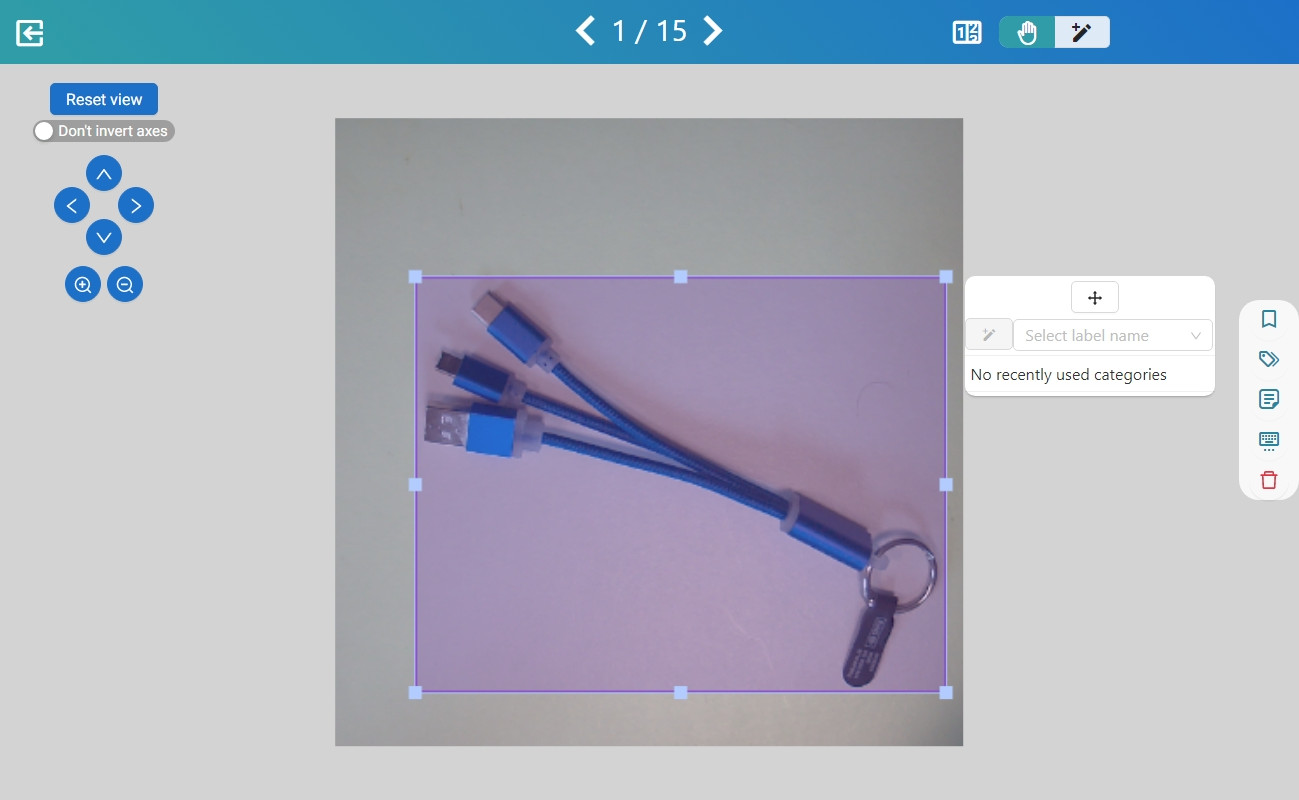
When you release the button, a pop-up window will appear.
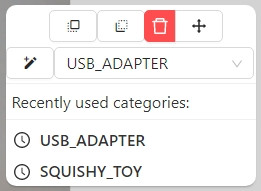
In this window you can give the annotation a new name or choose one of the names already used in the dataset. You can also change the size and position of the annotation, or delete it by clicking the trash can icon or pressing the Delete key on your keyboard.
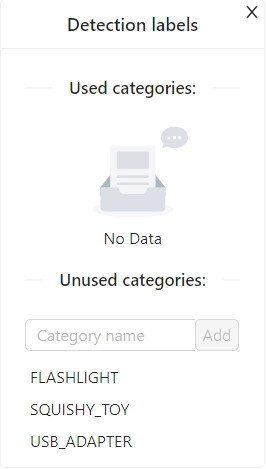
Click on the Detection labels icon in the right-hand menu to see the currently used categories and unused categories. Here you can also add new categories.
Scroll with the mouse to zoom in and out of the image. Pressing the scroll button switches on the image panning mode, which can be useful at high zoom levels.
At any time you can restore the scale and position of the image to its original form using the Reset View button on the left.
#
Adding categories
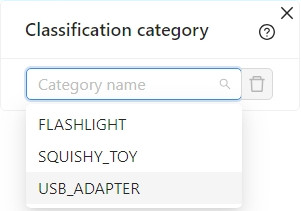
It is possible to add a classification category to the image during the annotation process. To do this, click the Classification category icon in the right-hand menu and select a category or add a new one.
#
Troubleshooting
Sometimes the annotations will overlap and you will not be able to select the one you are interested in. There are two ways to solve this problem:
Click one of the options in the pop-up window next to the annotation: put the label on the top of the canvas or put the label on the back of the canvas.
Right-click on another label. This will move it to the bottom so you can select the one you are interested in.